Table of Contents
- Understanding Common Stun Gun Parts That May Require Replacement
- Essential Safety Precautions Before Attempting Repairs
- Step-by-Step Procedures for Removing and Replacing Damaged Components
- Recommended Tools and Replacement Parts for Reliable Performance
- In Conclusion
Understanding Common Stun Gun Parts That May Require Replacement
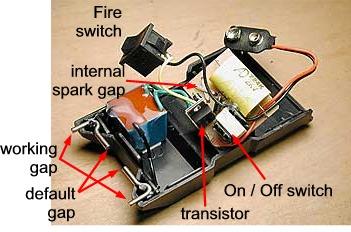
When working with stun guns, it’s essential to identify which components are most prone to wear and tear. The electrodes-the metal contact points delivering the electric charge-can become corroded or damaged after extended use, affecting performance. Similarly, the battery often loses capacity or fails altogether, especially in models without user-replaceable power sources. Examining the trigger mechanism is also crucial, as dirt and debris can cause misfires or prevent the device from activating. Lastly, don’t overlook the safety switch, which can degrade or malfunction, compromising user safety during operation.
Regular inspections can help determine when these parts need replacement to maintain optimal function and safety. Aside from wearing out naturally, accidental drops or exposure to moisture can accelerate damage to these components. If you detect any irregularities such as dim charging indicators, inconsistent firing, or physical damage, addressing them promptly is key. Below is a quick overview of parts commonly replaced:
- Electrodes: Replacement ensures efficient electrical discharge.
- Battery: Keeps the stun gun fully powered and ready.
- Trigger: Maintains reliable activation of the device.
- Safety switch: Guarantees safe handling and storage practices.
Essential Safety Precautions Before Attempting Repairs
Before diving into any repair work, it’s crucial to fully understand the risks involved in handling stun gun components. Ensure the device is completely powered down and disconnected from all power sources. Wearing insulated gloves and safety glasses can prevent accidental electric shocks and protect your eyes from unexpected sparks or debris. Work in a well-lit, clutter-free environment to avoid mishandling parts or tools, and always keep a fire extinguisher nearby to tackle any electrical mishaps swiftly.
Never attempt repairs without thoroughly reviewing the manufacturer’s manual or technical diagrams, as improper handling can lead to permanent damage or injury. Keep an organized toolkit on hand, including non-conductive tools designed for electronic repairs. Additionally, avoid working alone – having someone nearby can be invaluable in case of emergencies. Prioritize safety above all to ensure your repair process is as smooth and risk-free as possible.
Step-by-Step Procedures for Removing and Replacing Damaged Components
Begin by ensuring that the stun gun is completely powered off and disconnected from any power sources to avoid accidental discharge. Carefully inspect the unit to identify the exact components that require replacement, such as electrodes, batteries, or internal wiring. Use a clean, well-lit workspace and gather the necessary tools: a small screwdriver set, replacement parts that match manufacturer specifications, and safety gloves to protect both yourself and the device.
Next, gently disassemble the stun gun casing, keeping track of all screws and small components to prevent any loss. When removing damaged parts, avoid forcing any elements out, as this might cause damage to surrounding circuits. Replace parts by connecting them securely and verifying all internal connections are tight and correctly aligned. Before reassembling, double-check for any stray dust or debris inside the housing. Once put back together, perform a functionality test in a safe environment to confirm the stun gun operates correctly and safely. Remember, adherence to manufacturer guidelines is critical throughout this process.
Recommended Tools and Replacement Parts for Reliable Performance
Ensuring your stun gun operates effectively starts with selecting the right equipment for repairs. Invest in high-quality insulated screwdrivers and precision tweezers to handle delicate components without causing additional damage. A multimeter is essential for diagnosing electrical faults and confirming circuit continuity post-replacement. Always seek out components that meet or exceed the manufacturer’s specifications, such as authorized replacement electrodes and certified battery modules, to maintain safety standards and performance reliability.
When sourcing parts, prioritize suppliers known for authenticity and durability. Consider stocking up on auxiliary items like replacement fuses, durable O-rings to secure housing components, and protective lubricants that ensure smooth mechanical movement. Using these tools and parts not only prolongs the lifespan of your device but also guarantees consistent output with every use, keeping safety mechanisms intact and operational under critical conditions.
In Conclusion
Replacing damaged stun gun parts can seem daunting, but with the right tools, careful attention, and a commitment to safety, it’s entirely manageable. Always prioritize using manufacturer-approved components and follow the recommended procedures to maintain your device’s reliability and effectiveness. Remember, when in doubt, consulting a professional or the manufacturer can save you time and prevent potential hazards. By taking these precautions, you can extend the life of your stun gun and ensure it remains a dependable tool for your personal safety. Stay safe and stay prepared!Check Our Other Blogs
- StunGun – Your Trusted Source for Stun Guns, Laws, and Self-Defense Tips
- PepperSprayLaws – Your Trusted Resource for Pepper Spray Information
- StunGunLaws – Your Trusted Guide to Stun Gun Legality and Safety


